So, you have a pre-schooler or young child you’d love to see grow into an avid reader…But you’re unsure where to start. Surely, you can’t just hand them a book and hope for the best? You’d be right! While books are important, there are many other skills-some essential- that support a child’s early reading journey. The best part? You can nurture all of these skills at home.
Whether you’re planning to home-educate or simply want to give your child a strong foundation before they begin school, the tips, games, and activities below will help.

1) Create a Language-Rich Environment
One of the greatest gifts you can give your child is early exposure to a language-rich environment. Research shows this is one of the strongest predictors of future success—academically and socially—outweighing factors such as economic background, parents’ education level, and even school choice. Children raised in language-rich homes may hear up to 30,000 more words by the time they start school than children in less language-rich settings.
But what exactly does a language-rich environment look like? It’s about much more than just books! It’s a home brimming with language in all forms: stories told aloud, conversations, songs, poetry, magazines, and of course, books. Let’s focus on a few of the simplest (and free!) ways to create one.
Conversation is Key
The simplest and most powerful tool is conversation. It costs nothing but your time and attention, and it’s something you can weave naturally into daily life. Young children love to be involved in what you’re doing, and everyday routines offer fantastic opportunities for vocabulary growth.
Take bath time, for example. In just a few minutes, you might use words like wet, dry, splashing, underwater, above the water, waves, and water drops. Add in talk about bath products, body parts, floating versus sinking, or sea creatures, and you’ll have introduced dozens of new words without even trying. Simple, frequent interactions like these are the foundation of a strong language-rich environment.
Songs and Nursery Rhymes
Songs -especially traditional nursery rhymes- are another wonderful and often overlooked source of language exposure. Not only do children enjoy them, but they’re also packed with stories, new ideas, and concepts you can build on through conversation.
Beyond vocabulary growth, nursery rhymes naturally include repetition, rhythm, rhyme, and alliteration- four features that are hugely beneficial to pre-readers. (We’ll explore these in more detail later in this post.)
Make the Most of Libraries
Finally, don’t underestimate the value of your local library. Libraries are a treasure trove for families of all backgrounds, especially if you’re working with a limited budget or minimal storage space at home. They’re also a brilliant resource for multilingual families or those living a more nomadic lifestyle.
Whether you borrow books to read at home or simply enjoy them during your visit, the variety of titles available can spark a child’s curiosity and open their world to new ideas, as well as new words.
To Summarise
- Language-rich environments are vital to children’s future success.
- Language exposure is about more than books—conversation, songs, and stories all count.
- Daily conversations are the most valuable way to build your child’s vocabulary.
- Songs and nursery rhymes are fun, free, and fantastic for pre-readers.
- Libraries are an invaluable resource for every family.
2) Rhyming games
As mentioned in Section One, rhyming is a fantastic skill for pre-readers to master. It’s one of the key phonological awareness skills -the ability to hear and manipulate the sounds in language- that forms a strong foundation for phonics.
Rhyming teaches children to listen closely to words, notice the sounds within them, and decide whether two words share similar sounds. Until a child can hear and compare sounds in words, phonics will remain a challenge. The good news? Rhyming activities aren’t just beneficial—they’re fun! Below are three of my favourite types of rhyming games and activities you can easily try at home.
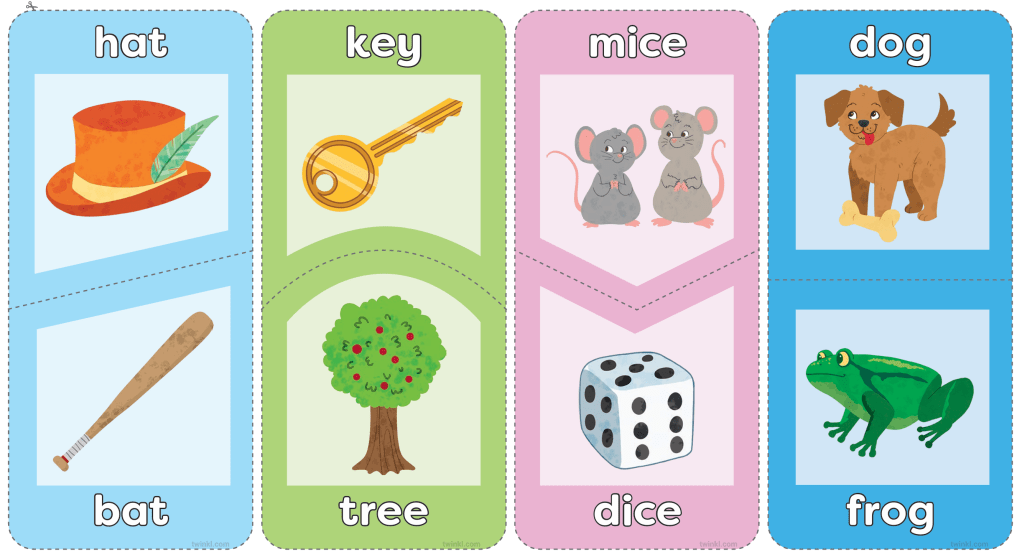
Rhyming Pair Cards
This resource can be bought or made at home and used in countless ways. If you’re making your own, start by thinking up (or googling) some simple rhyming pairs. Here are a few to get you started: cat/bat, dog/log, bin/pin, tap/map, pig/dig. Try to begin with simple CVC words (three-letter words with one vowel in the middle). You can always introduce more complex words as your child’s rhyming ability grows. I suggest starting with around 5–10 rhyming pairs; you can add more as you go.
Once you have your rhyming pairs, find an image to represent each word (you could also draw them if printing is an issue!). Try to keep the images simple and focused solely on the item to avoid confusion—real photos can work well. You can include the word on the card too if you’d like, but at this stage, the image is by far the more important feature.
When your cards are ready, introduce them to your child by saying the words together and listening to the sounds. Say both words in a pair slowly and clearly. Demonstrate how to hear the rhyme. Here’s an example of how that conversation might go:
“Cat and mat… I can hear they both sound similar. They both have an /a/ sound in the middle and a /t/ sound at the end. Cat and mat rhyme!”
Repeat this for each of your rhyming pairs. Once your child is familiar with the pairs and can identify rhymes with support, try some of the following games:
Match- Lay all the cards face up. Ask your child to find and pair the rhyming words. You can adjust the difficulty by changing the number of cards or the complexity of the words.
Memory- A twist on the traditional memory game. Lay the cards face down (start with a small number) and take turns turning over two cards. If they’re a rhyming pair, you get to keep them. If not, turn them back over. The winner is the person with the most pairs at the end. To make it more challenging, add more cards or use more complex rhyming pairs.
Simple Snap- The most challenging of these games. Start with a small number of cards. Divide them into two piles- one for each player. Take turns laying a card face up in the centre. If the card being laid rhymes with the one on top of the pile, shout “Snap!” and the player who called it first takes the whole centre pile. Keep going until one player has all the cards. They’re the winner! This game can also be played with more than two players. Increase the difficulty by adding more cards or more complex rhyming pairs.
Rhyming Families
These activities are an extension of the rhyming pair games above, so they should ideally be introduced once your child is confident with those. We’ll now build on rhyming pairs to create rhyming families. Rhyming families are collections of words that share the same rhyming sound. For example, the -at rhyming family includes words like cat, mat, pat, that, sat, bat, hat, flat, splat.
As before, you’ll need to either buy or create (printed or hand-drawn) rhyming family cards. Follow the same steps outlined in the rhyming pair games to create a card for each word. At this stage, I recommend including the word written on the card alongside the image, but this isn’t essential. You’ll need at least two rhyming family card sets for the activities below—though more is even better! You can always add new families over time. Once you have your rhyming family card sets ready, try the games below:
Sound houses/farms- On a plain piece of paper, choose a rhyming family sound and write it at the top (for example, you might choose -at, -og, -it, or any other). You can draw a house, farm, or barn to collect your sounds in if you’d like- this isn’t essential, but it can add a fun visual element! Consider laminating these sheets for reuse.
Lay all your word cards out face up and search through them to find words that belong in your sound house/farm. To increase the challenge, create a separate house/farm for each rhyming family and sort the words accordingly. You can even turn this into a competitive game by giving each player their own sound house/farm and seeing who can find all their matching words the fastest.
Spot and Grab- Not the most creatively named game, but often very popular! This activity helps build speed in rhyme recognition.
Lay all your word cards in the middle between two players. Either have a third person choose a rhyming family sound, or create a spinner or dice to generate one if there are only two of you. Once a sound has been identified, race to find as many words from that rhyming family as you can. The player who collects the most wins! Add more cards to increase the difficulty.
Note: Be sure to set some rules and expectations before playing- this one can get competitive!
Simple Snap- This game works just as well with rhyming families as it does with rhyming pairs. The only difference is that players can shout “Snap!” if any word from the same rhyming family is played on top of another.
Rhyming Chains
This activity is a little different from the ones above, as it doesn’t require any resources or cards. Instead, it focuses on verbal rhyming skills and builds on your child’s understanding of rhyming families. Because it relies on prior knowledge of rhyme, it’s best played once your child is already comfortable with the concept.
You can play Rhyming Chains in a few different ways: as a collaborative team, in competition, or as a game of word tag. Each variation is explained below:
As a collaborative team- Choose a rhyming family sound together (e.g. -at, -ig, -op) and then work as a team to find as many words from that family as you can. You can count the words mentally, jot them down, or create a tally chart- linking nicely with early maths skills!
Try exploring a few different rhyming families. Which family has the most members? Which one has the least? I’ve even built bar graphs with this data before- it’s another brilliant cross-curricular link to maths.
Against one another- Choose a rhyming family and set a timer (two minutes usually works well). During that time, each player independently tries to come up with as many rhyming words as possible. You can mentally count, write the words down, or keep a tally. When time’s up, share your scores- the winner must be able to prove their rhyming words to claim victory! Repeat with different families to keep the game going.
Word tag- Pick a rhyming family as a group. One person starts by saying a word from that family. Then, taking turns, each player adds a new word—no repeats allowed! How long can you keep the chain going?
To make it more active and fun, you can pass, throw, or kick a ball between players as each word is said. Keep track of your high scores. Is there a rhyming family that’s easier to chain than others? Why do you think that is?
To Summarise
- Rhyming is one of the key phonological awareness skills needed for early reading success.
- You can easily create low-cost, engaging resources to support rhyming practice at home.
- Start with rhyming pairs. Try games like Match, Memory, or Simple Snap to build confidence.
- Move on to rhyming families with games like Sound Houses or Spot and Grab.
- Don’t forget verbal rhyming skills! Activities like Rhyming Chains develop fluency and recall.
3) Syllable games
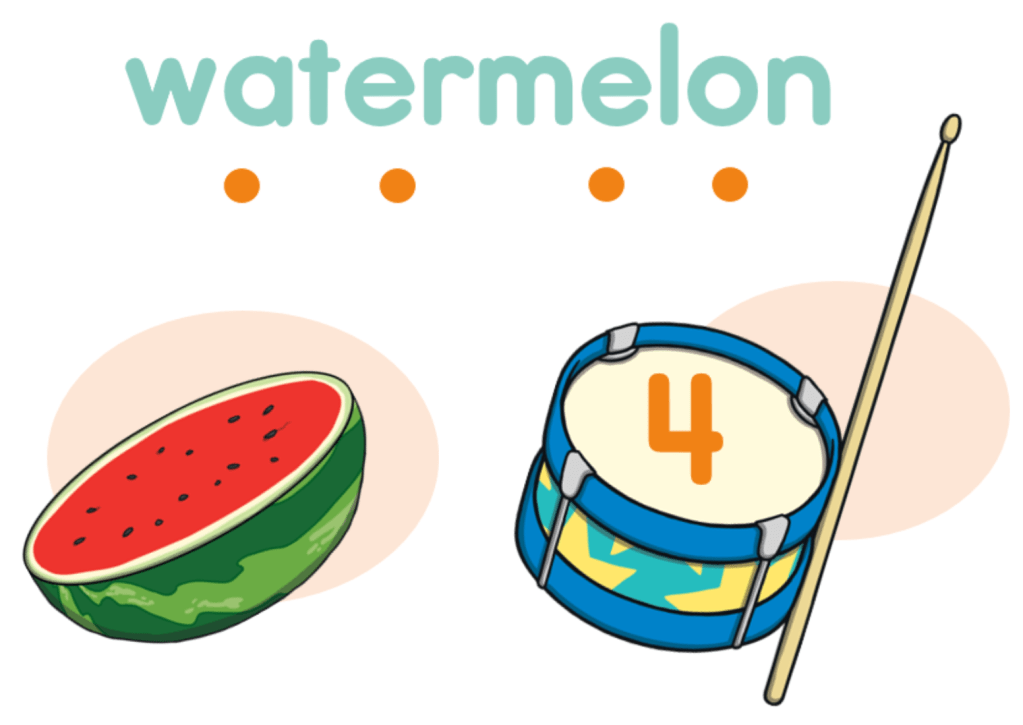
An understanding of syllables is the second key phonological awareness skill we’ll cover in this post. Like rhyming, it’s a vital prerequisite for developing phonics knowledge. Syllables refer to the beats or parts of a word- each beat is one syllable. For example, lemon is a two-syllable word, broken down into le-mon.
When children can break words into syllables, they are better equipped to sound out each part when learning to read and write. This makes reading and spelling feel much more manageable and less overwhelming.
If you’re ever unsure how many syllables a word has, try this simple trick: place your hand under your jaw and say the word slowly. Each time your jaw drops and touches your hand, that’s one syllable. Try it with the following words:
- No – one syllable
- Happy – two syllables
- Pineapple – three syllables
You can also introduce this method to your child- it’s a great way to make syllables feel tangible.
Below are three more fun and engaging activities to explore syllables with your child.
Clap them out
The best way to introduce syllables is verbally, using familiar words, rhymes, and simple songs (once again, nursery rhymes are perfect for this!). Practising syllables works particularly well through the “I do, We do, You do” approach, which I’ll outline below.
One of the first words I recommend introducing is your child’s name. Here’s how the approach might look:
‘I do’ (the adult leads):
Say the child’s name or chosen word slowly. Then, repeat it while clapping once for each syllable. Do this multiple times and at different speeds to build familiarity and rhythm.
‘We do’ (adult and child together):
Next, ask your child to join in. You might say the word and clap the syllables together, or take turns like an echo—you say and clap the word, then they repeat it back solo. Stay in this stage until your child shows solid understanding and consistent rhythm.
‘You do’ (child working independently):
Once your child is confident, give them words without modelling. Ask them to break the word into syllables and clap it back to you. If they can do this consistently and accurately, you can be sure they have developed a strong foundation in understanding syllables.
Once you’re confident with single words, this can become a fun activity to try with simple phrases, rhymes, or songs. You might notice that many rhymes follow clear syllable patterns—this can be interesting to explore further if your child shows curiosity or enthusiasm.
Playdough Squish/Pass the Ball
If your child is more of a hands-on learner -or if you want to explore syllables further after clapping them out- you might enjoy trying one of these multi-sensory activities.
Multi-sensory learning has been shown to strengthen memory and retention, making it especially effective for foundational literacy skills like phonological awareness. All you’ll need are a few simple items such as a ball, beanbag, or teddy, and some playdough or slime.
Playdough Squish- For this activity, create 4 or 5 small balls of playdough or slime and line them up in a row. You’ll need as many dough balls as there are syllables in your longest word.
Say the word aloud. Each time you reach a new syllable, squish one ball of dough. Re-roll the dough and try again with a new word. You can repeat this with as many words as you like. It’s a fun, tactile way to make syllables more concrete and engaging.
Pass the Ball- This is a great partner activity. Start by choosing a word and making sure both players know what it is. Then, say the word slowly, breaking it into syllables. As each syllable is spoken, pass the ball (or soft item) to the other person.
For example: pine-ap-ple (3 syllables = 3 passes).
You can increase the challenge by using longer words, short sayings, or even lines from songs or rhymes.
Snip it up
This is the final syllable activity suggested in this post—and the first to involve the written word. Because of this, it’s more suited to beginner readers than pre-readers. It’s important that children are confident exploring syllables verbally before attempting this activity. They will also need some basic letter-sound knowledge to complete it successfully.
Start by writing a few simple two-syllable words on scraps of paper (you can introduce more complex words later). Read each word aloud to your child, running your finger under the letters as you go.
Demonstrate how to hear the break in syllables and then, using scissors, snip the word where the syllables divide. Now each syllable will be on its own piece of paper. Push the pieces together and pull them apart several times to show how the word can be broken into parts and reassembled.
Then try again with a new word—this time, allow your child to have a go. They may need more support with this activity than the previous ones, which is completely normal. Take your time and focus on building confidence.
To Summarise
- Understanding syllables is another of the key phonological skills needed for early reading.
- It should be introduced verbally before being explored in written form.
- Consider the activities Clap it Out, Playdough Squish, Pass the Ball, or Snip it up to explore this concept with your child.
4) Sound songs and the alphabet
Many children grow up singing and hearing the alphabet song. While it’s a fantastic tool for learning letter names, it’s not actually where I would recommend starting. This is because early phonics focuses on letter sounds, not letter names—and introducing letter names too early can sometimes lead to confusion.
When teaching letter sounds, it’s best to start with each letter’s primary (most common) sound. For example, when teaching the letter A, begin with the short /a/ sound as in apple, rather than the long /ai/ sound as in acorn.
The BBC Bitesize website has a great guide to the primary sounds for each letter (search: Phonics – letter sounds – Early Years English – BBC Bitesize).
Once your child is confident with letter sounds, you can begin to introduce letter names. Being able to connect both lowercase and uppercase letters with their corresponding sounds gives children a strong head start in phonics and early reading.
Introducing Letter Sounds
You can begin introducing letter sounds informally from a very young age- even toddlers enjoy phonics songs!
Phonics songs- Songs are my favourite way to introduce sounds. Many phonics schemes offer free songs on YouTube. Two great options:
Jolly Phonics: Includes a unique song for each sound. My top choice for pre readers.
Link: Jolly Phonics A-Z | Phase Two Phonics Song for Kids#phonics_song #phonics #kids
Song of Sounds: Fun and energetic, though it includes digraphs (two letters, one sound) so not so not as suitable for pre-readers. It is still fun to sing though!
Link: Song Of Sounds – Stage 1
Actions- Pairing actions with sounds makes learning multi-sensory—this is called dual coding, where using more than one type of input (sound, movement, image) strengthens memory. Try to match actions to the short sound of each letter.
For example, for the letter O, pretend to eat an orange (short /o/), rather than miming opening something (long /o/).
If you are preferring one song in particular, you can often find matching actions online. If not, invent your own with your child!
Letter sound cards- Create cards with a picture representing each sound- ideally matching your chosen action. You can draw these or find images online together. Laminating helps them last!
Once you have the cards there are many games you can play. You could use them like flash cards, holding one up and asking your child to tell you the sound, sing the song, or show the action (or all three). Or you could lay some or all the cards out and say a sound or show an action asking your child to find the picture card that matches. Have them quiz you in return!
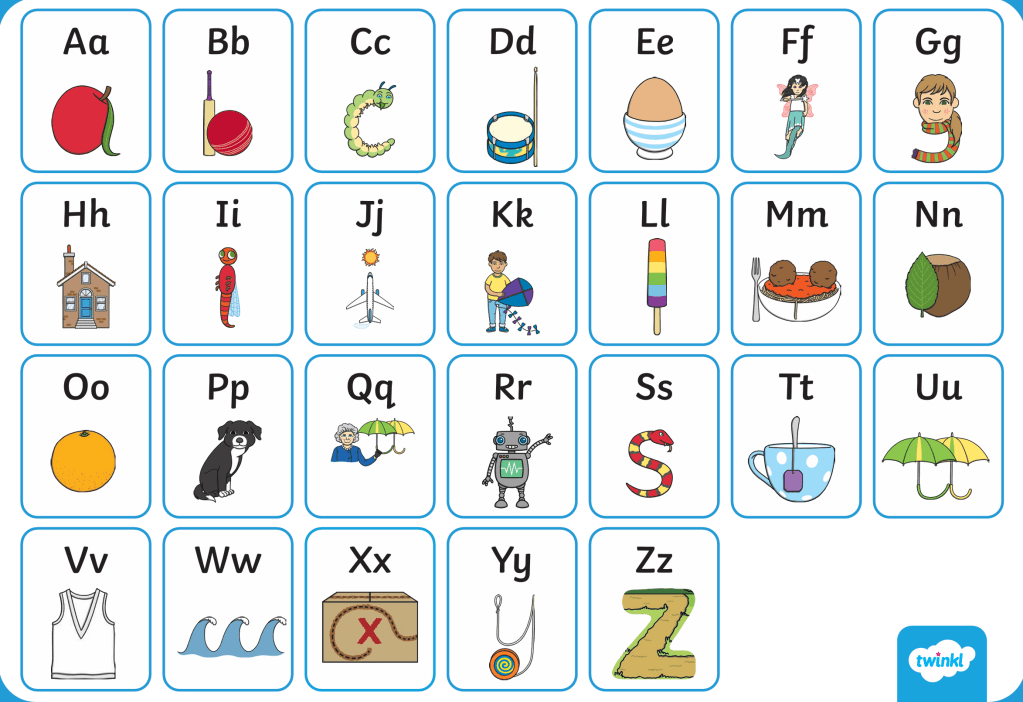
The Alphabet
Once your child is confident with their letter sounds, it’s a great time to introduce letter names and the written forms of each letter—both uppercase and lowercase.
The alphabet song- Now it’s the alphabet song’s time to shine! There are countless versions available online, and any will work. It can be helpful to follow along with an alphabet chart if not using a video.
Upper and lowercase cards- Create or buy two sets of letter cards- one for uppercase letters and one for lowercase. Explain to your child that each letter has two forms: a lowercase or “little” letter, and an uppercase or “grown-up” letter. Both forms represent the same letter and sound.
Lay out both sets in alphabetical order, placing uppercase letters above their lowercase versions. Look at them together and talk about what you notice.
Once your child is familiar, mix the cards up and ask them to match the uppercase and lowercase letters. Repeat regularly until they can do this with ease and speed.
Strengthening Connections
Once your child knows their letter sounds, letter names, and the written forms of each letter, it’s time to play some games to reinforce those connections! Here are a couple of favourites:
Memory- This classic game can be played with any combination of card sets (e.g. uppercase and lowercase, lowercase and sound pictures, or uppercase and sound pictures). Use the same rules as in the rhyming pairs game: turn over cards to try to find a match.
You can adjust the level of challenge by changing the number of cards. For an advanced version, use all three card types and have your child turn over three cards each turn instead of two!
Letter hunt- Choose a focus letter—perhaps one your child finds tricky. On a piece of plain paper, write many versions of that letter in both uppercase and lowercase. Use a variety of colours and sizes.
Then, using the same pens or colours, fill the rest of the page with other uppercase and lowercase letters. Your child’s task is to find and circle (or dab with a bingo marker) every version of the focus letter.
Tip: Laminate your sheets to reuse them with a whiteboard pen!
To Summarise
- Letter sounds should be introduced prior to letter names.
- The more multi-sensory you can make learning the more likely it it to stick. Songs and actions work well for this!
- Teach both uppercase and lowercase letters to your child. Explain how they link and practise this.
- Play letter games to strengthen these connections, Match, Memory and Letter Hunt are good for this.
5) Sound Games
Once your child is confident with their letter sounds, it’s time to have some fun with them! The more your child plays and experiments with letter sounds, the more secure their understanding will become. These games also help create a positive first experience with letters, making your child more likely to feel confident and excited about learning to read.
It’s important to explore sounds in all positions within words-beginning (initial), end (final), and middle/centre sounds. Cente sounds should only be explored within CVC words at this stage. Start with initial sounds and build from there.
Below are some game ideas, grouped into those best for initial sounds and those that work for any sound position:
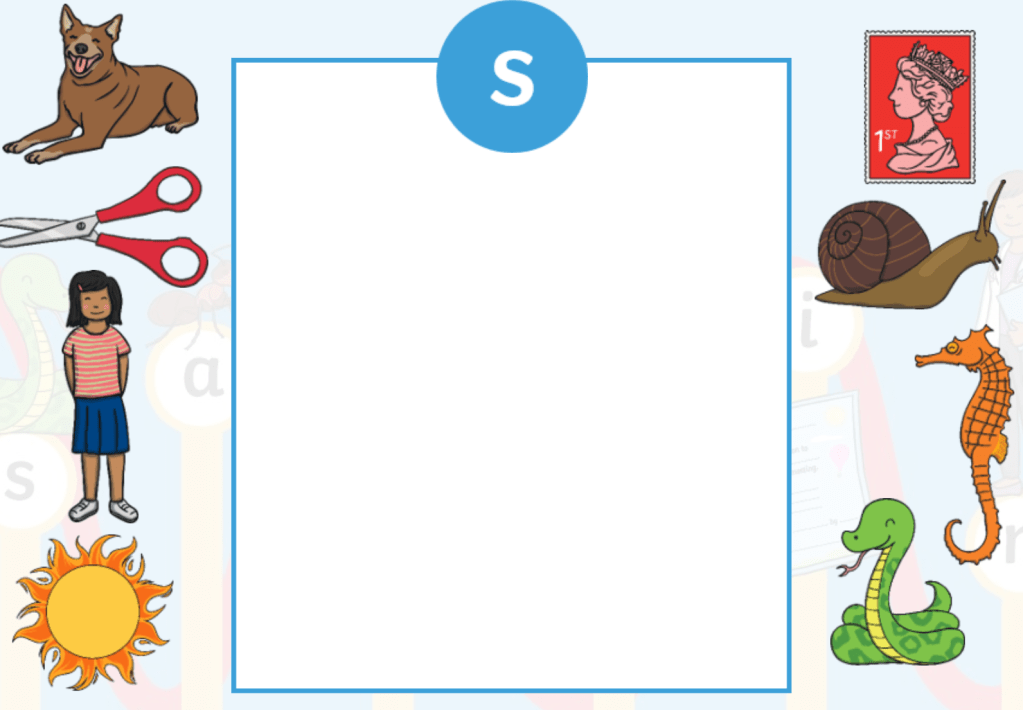
Initial sounds
Initial sounds are a great starting point for sound games, as they’re often the easiest for children to recognise. Alliteration (words in a row starting with the same sound, i.e. Beautiful big blue butterfly) is a helpful concept to explore here, and tongue twisters can make this hilariously fun!
Sound sorting- Choose two or more sounds and mark out an area for each (chalk circles, paper plates, or hoops work well). Provide your child with small objects or picture cards, and ask them to place each in the correct section based on its starting sound.
For a challenge, give your child pre-sorted groups and have them guess what the starting sound is.
Sound hunts- Choose a target sound and search for items starting with that sound around the house or while out and about. Keep a tally, or take photos to use later in letter projects or sorting games.
Letter drawings- Print or draw a large letter on a page (upper and lowercase preferably). Have your child fill the space around it with pictures or drawings of items starting with that sound. Create pages for multiple letters and turn them into a personalised alphabet book or display!
Initial, centre, or final sounds
Centre and final sounds are trickier to distinguish—especially middle sounds. Limit centre sound work to simple CVC (consonant-vowel-consonant) words, as anything more complex may require segmenting, a skill beyond early pre-reading.
Sound splat- Lay out a few letters (e.g., P, T, B, N) on the floor or table. Using a fly swatter, spoon, or even a water pistol outdoors, ask your child to, for example, “splat the sound at the end of cat”. Segment the word slowly if needed. You can also do this with centre sound but I suggest starting with just two sound options in this case.
Word hunt- This is like the Letter Hunt game, but instead of letters, you use whole words or pictures of things. Start by making a page filled with pictures or words—some that have the sound you’re focusing on, and some that don’t. Then ask your child to find and mark the ones that match the sound. They can circle them, colour them in, or dab them with a bingo marker. For example, say: “Can you find all the pictures that start with the /r/ sound? Colour them in!” Begin with beginning (initial) sounds, then try ending sounds, and finally middle sounds when your child is ready.
To Summarise
- Sound games help reinforce letter sound knowledge in a fun, memorable way.
- Begin with initial sounds before exploring ending and middle sounds.
- Keep it playful! A positive, engaging experience builds excitement and confidence around learning letters and sounds.
Conclusion
As we wrap up our journey through top tips, activities and games for pre-readers, I hope you’re feeling inspired and well-equipped to support your child’s early literacy journey in a way that’s playful, meaningful, and developmentally appropriate. Pre-reading isn’t about rushing children into decoding words- it’s about laying strong foundations through everyday experiences, joyful interactions, and rich language exposure.
Most crucially remember that creating a language-rich environment is the heart of it all. Children thrive when they’re surrounded by talk, stories, songs, and print. Whether you’re narrating your day, sharing a favourite picture book, or exploring new vocabulary during play, you’re building the oral language skills that underpin reading success. All the other games, tips and activities come secondary to this.
Importantly, follow your child’s lead. Celebrate curiosity, encourage questions, and offer praise for effort rather than correctness. The goal isn’t to push formal reading before a child is ready- it’s to nurture a love of language, books, and learning. If a game feels like a struggle, step back and try again later. Early literacy development isn’t linear, and every child progresses at their own pace.
By building these foundations through engaging, language-rich play, you’re not just preparing your child to read- you’re helping them develop confidence, communication skills, and a lifelong love of learning. That’s something to be truly proud of.
I’ll leave you with a favourite quote that perfectly captures the importance of this journey:
“Once you learn to read, you will be forever free.” — Frederick Douglass
Whether you’re a parent, educator, or caregiver, your efforts today are opening the doors to endless possibilities for your child tomorrow. Keep playing, keep talking, and keep reading- your child’s literacy journey has already begun.
